Reports can be uploaded as a spreadsheet instead of keying on portal. If you prefer to report on Portal, please refer to the applicable article for next steps:
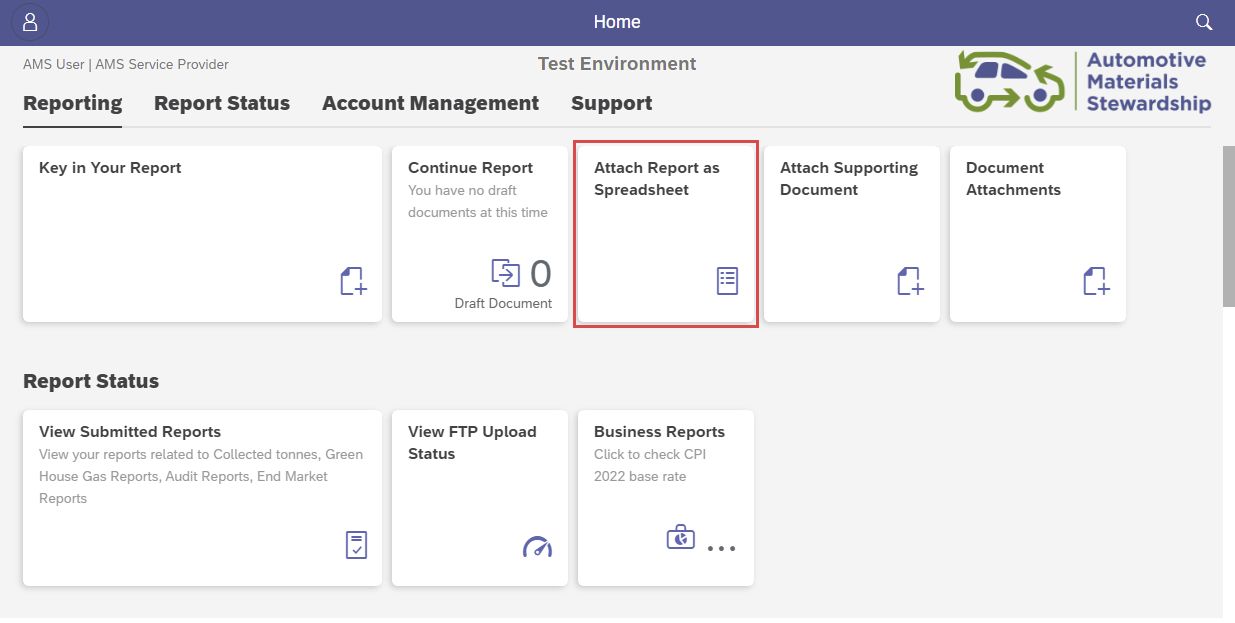
Select the ‘Attach Report as Spreadsheet’ tile on the home page.
Select Contract
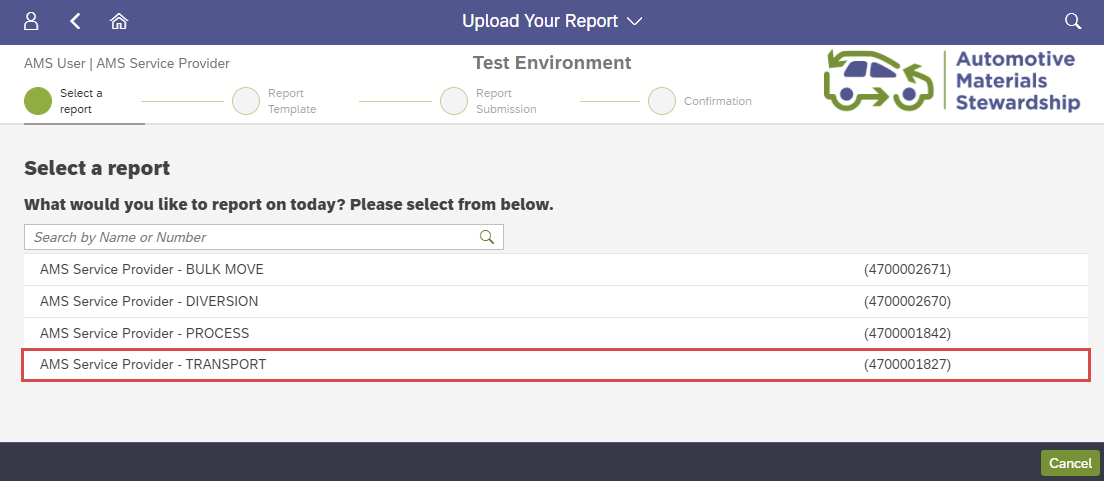
Select the contract you’ll be working with from the list presented. If there is only one active contract, it will automatically select.
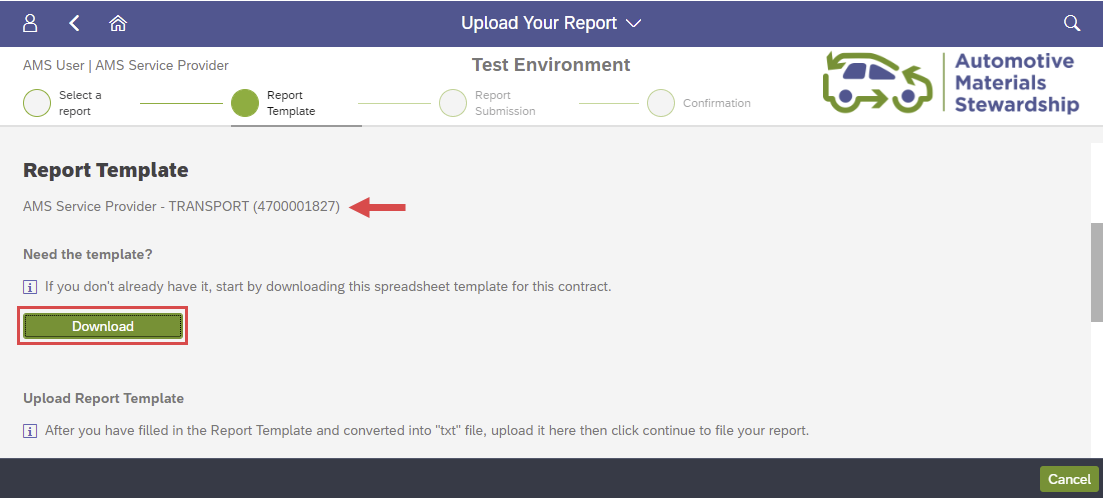
Download Template
It is recommended to download the spreadsheet each time to ensure it is the most recent version available.
The template is a macro-enabled Excel file which will open automatically.
Excel Template Maintenance
Download the template, which is an Excel macro-enabled file.
Select ‘Enable Content’ if a yellow security warning dialogue bar appears.
If you see the red security risk warning below, please follow these steps to enable the Excel workbook Macro.

Enable Macro
Please follow these steps to enable the Excel workbook Macro.
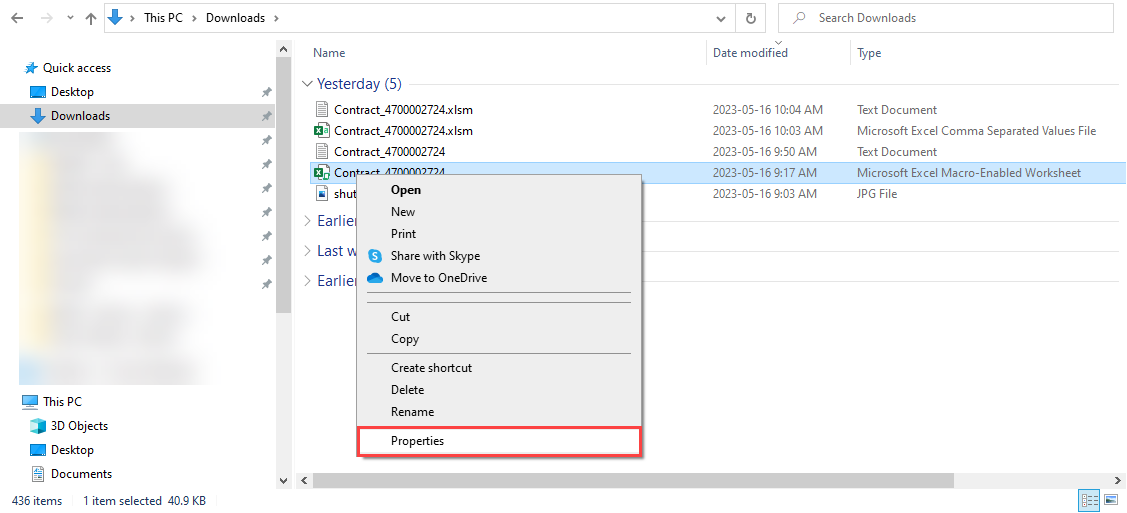
Close the open Excel file. Locate where the file downloaded. Right click on the downloaded file and select 'Properties'.
Unblock the file by checking the 'Unblock' box and click 'Apply' and then 'OK'.
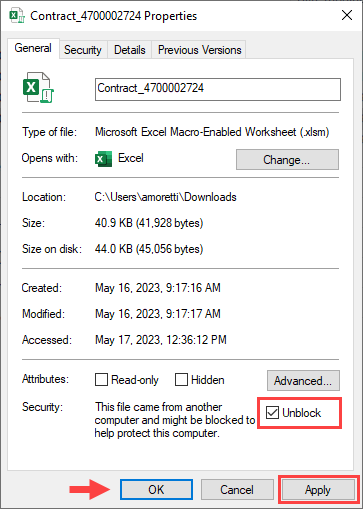
Re-open the unblocked file and the red warning box will no longer appear. Select the “Enable Content” ribbon at the top to proceed.
Complete the Excel Template
Open the downloaded Excel macro-enabled file. Select ‘Enable Content’ if the Security Warning dialogue bar appears.
Navigate to the ‘Sample Data’ tab, which you can copy/paste from, into the ‘Transporter_BOL_Data’ tab. The Service and Delivery dates will default to the date the template was downloaded. You will need to fill out the additional blank fields as they pertain to your claim data.
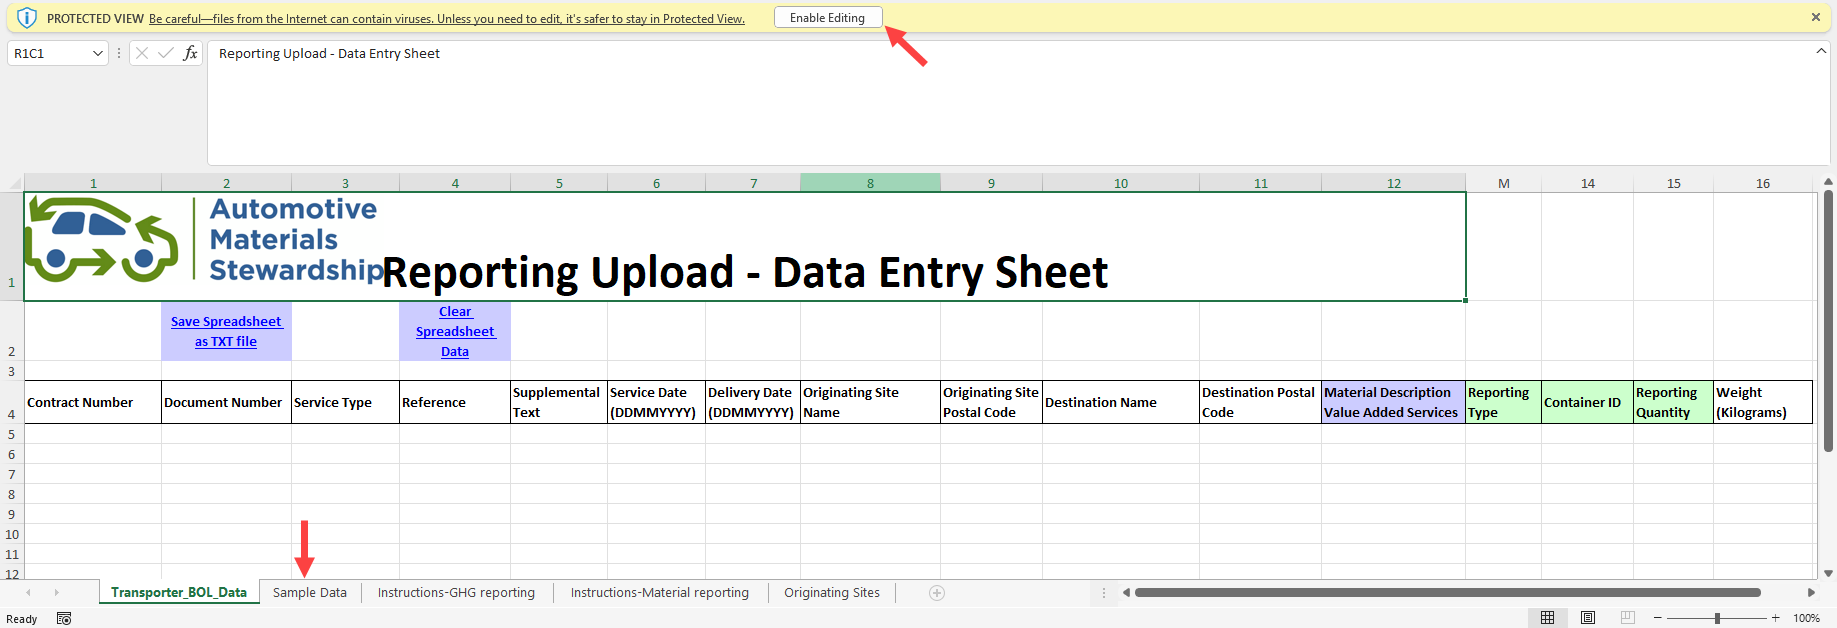
On the Transporter_BOL_Data tab, paste what was copied from the Sample Data tab.
- Populate/adjust the fields as needed, adding in the quantities and other required information.
- If there are extra rows that do not contain any data, please delete them.
- Refer to the Field Descriptions section at the end of this article to see how to populate the columns for different scenarios.

Once your claim is complete, click ‘Save Spreadsheet as .txt file’ button at the top left of the Transporter_BOL_Data tab.
Upload .txt File into Portal
On the Portal, select the document to be uploaded by clicking the plus button on the right-hand side or dragging and dropping the file into the attachment section. Be sure to select the .txt version of the file.
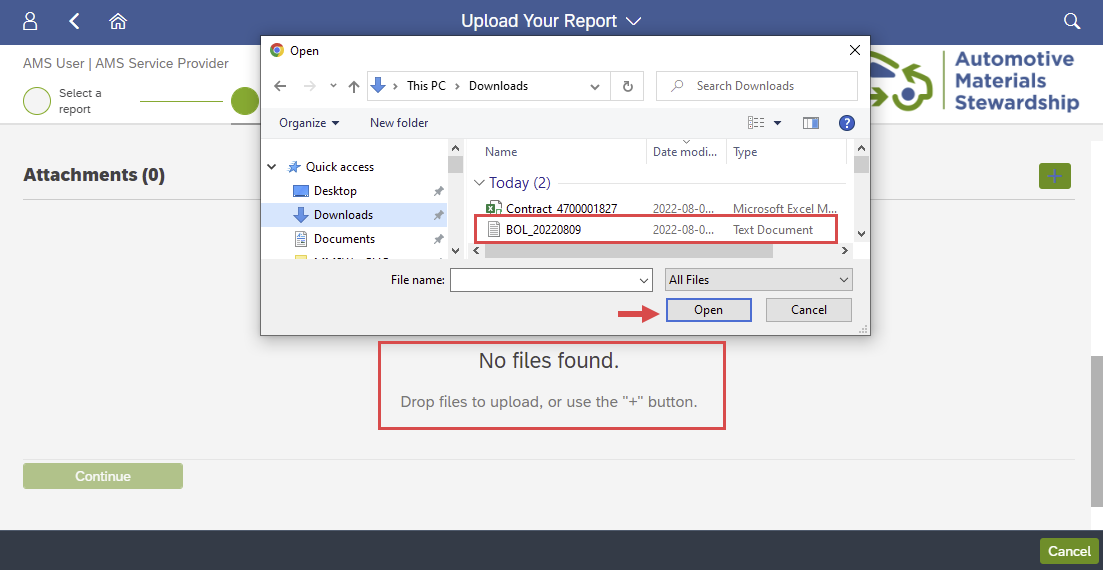
Use ‘x’ to delete any unwanted documents. Click continue once finished.

Spreadsheet Upload Validation
The next screen will provide an overview of the document contents and will identify any issues with formatting.

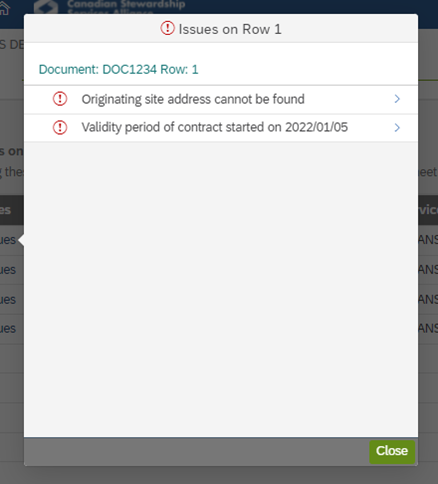
Click on the blue hyperlink text under ‘Issues’ or click ‘Show All Messages’ to identify areas that require editing before submission. Re-open the Excel file and fix applicable fields, save the edited document in .txt format and upload it again.
Line items without issue that are ready for submission will have a green checkmark.
After corrections have been made and the corrected document has been uploaded:

Submitting Your Report
Click ‘Submit Report Now’ button to submit the claim. A percentage-processing bar will show the progress on submission status.

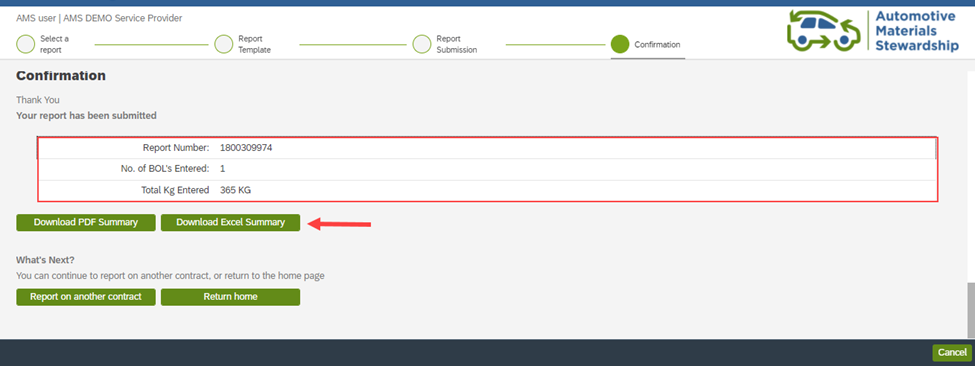
Like manually keying in a claim, an overview of the submission will be shown. The claim can be downloaded in PDF or Excel form. You can choose to navigate back to the home page or submit a claim for another contract.
Field Descriptions
Review the sections below to see how to populate each column on the spreadsheet for different scenarios.
Transport Claim (Direct Move)
For a transport claim related to a Direct Move, fill in the fields as follows:
| # |
Field |
Required Information |
| 1 |
Document No. |
Input the document number related to the movement, such as a BOL or Manifest number. |
| 2 |
Service Date |
Input the date the material was collected. |
| 3 |
Delivery Date |
Input the date the material was dropped off at the Processing Facility address. |
| 4 |
Reference |
This is an optional field that allows you to enter a document number or any reference information key meaningful to your organization (max 12 characters). |
| 5 |
Supplemental Text |
This is an optional field that allows you to enter additional reference information (max 30 characters). |
| 6 |
Originating Site |
Input the address of the Collection Site where the material came from. |
| 7 |
Destination Site |
Input the Processing Facility address, where the material was received. |
| 8 |
Service Type |
This confirms you are currently keying a ‘Transport Claim’. |
| 9 |
Reporting Qty |
Key in the number of containers. For example, if you received three 240 Litre totes, key in “3” here. |
| 10 |
Measured Quantity |
Key in the weight of the material. For example, if you received three 240 Litre totes weighing 100 kg, key in “100” here. |
| 11 |
Containers |
An optional field where you can key in a reference number related to your containers. |
Transport Claim (Bulk Move)
For a transport claim related to a Bulk Move, fill in the fields as follows:
| # |
Field |
Required Information |
| 1 |
Document No. |
Input the document number related to the movement, such as a BOL or Manifest number. |
| 2 |
Service Date |
Input the date the material was collected. |
| 3 |
Delivery Date |
Input the date the material was dropped off at the first Consolidation Point address. |
| 4 |
Reference |
This is an optional field that allows you to enter a document number or any reference information key meaningful to your organization (max 12 characters). |
| 5 |
Supplemental Text |
This is an optional field that allows you to enter additional reference information (max 30 characters). |
| 6 |
Originating Site |
Input the address of the Collection Site where the material came from. |
| 7 |
Destination Site |
Input the first Consolidation Point address, where the material was received. |
| 8 |
Service Type |
This confirms you are currently keying a ‘Transport Claim’. |
| 9 |
Reporting Qty |
Key in the number of containers. For example, if you received three 240 Litre totes, key in “3” here. |
| 10 |
Measured Quantity |
Key in the actual weight of the material. For example, if you received three 240 Litre totes weighing 100 kg, key in “100” here. |
| 11 |
Containers |
An optional field where you can key in a reference number related to your containers. |
Bulk Move Report
For a Bulk Move Report, fill in the fields as follows:
| # |
Field |
Required Information |
| 1 |
Document No. |
Input the document number related to the movement, such as a BOL or Manifest number. |
| 2 |
Service Date |
Input the date the material was collected from the last Consolidation point. |
| 3 |
Delivery Date |
Input the date the material was dropped off at the Processing Facility address. |
| 4 |
Reference |
This is an optional field that allows you to enter a document number or any reference information key meaningful to your organization (max 12 characters). |
| 5 |
Supplemental Text |
This is an optional field that allows you to enter additional reference information (max 30 characters). |
| 6 |
Originating Site |
Key in the address of the last Consolidation point where the material came from. |
| 7 |
Destination Site |
Input the Processing Facility address, where the material was received. |
| 8 |
Service Type |
This confirms you are currently keying a ‘Bulk Move Report’. |
| 9 |
Reporting Qty |
Key in the number of containers. For example, if you received three 240 Litre totes, key in “3” here. |
| 10 |
Measured Quantity |
Key in the actual weight of the material. For example, if you received three 240 Litre totes weighing 100 kg, key in “100” here. |
| 11 |
Containers |
An optional field where you can key in a reference number related to your containers. |
Once all information has been keyed, click ‘Submit Report’ at the top right.
Process Claim
For a Process Claim, fill in the fields as follows:
| # |
Field |
Required Information |
| 1 |
Document No. |
Input the document number provided to you by the Hauler when they delivered the material.
- Document number is typically a BOL# but sometimes may use other document types.
- The number must be unique. If you are using the same document number for multiple reports (ex. 1001234), add a unique suffix to the document number for each submission (ex. 1001234-A, 1001234-B, etc.).
|
| 2 |
Service Date |
Input the date indicated to you on the document provided to you by the Hauler. Generally, this is the same date of delivery from the Hauler. |
| 3 |
Delivery Date |
Input the date the material was received at the Processing Facility. |
| 4 |
Reference |
This is an optional field that allows you to enter a document number or any reference information key meaningful to your organization (max 12 characters). |
| 5 |
Supplemental Text |
This is an optional field that allows you to enter additional reference information (max 30 characters). |
| 6 |
Originating Site |
Key in the address of where the material came from.
- This information will be provided on the document provided by the Hauler
- It may include the address of a Collection Site or Consolidation Point
- The Hauler’s address is also acceptable
|
| 7 |
Destination Site |
Input the Processing Facility address, where the material was received. |
| 8 |
Service Type |
This confirms you are currently keying a ‘Process Claim’. |
| 9 |
Reporting Qty |
Key in the number of containers. For example, if you received three 240 Litre totes, key in “3” here. |
| 10 |
Measured Quantity |
Key in the actual weight of the material. For example, if you received three 240 Litre totes weighing 100 kg, key in “100” here. |
| 11 |
Containers |
An optional field where you can key in a reference number related to your container type(s). |
Diversion Report
For a Diversion Report, fill in the fields as describe below.
| # |
Field |
Required Information |
| 1 |
Document No. |
Each report must have a unique Document Number.
If you have a unique BOL or other Document, please enter that.
If you do not have a unique BOL or other Document number, follow the steps below:
Please enter a date that refers to the end of the quarter that you are reporting for. If you are reporting once per quarter, please follow example #1:
- For reporting on materials processed and sent to end market during Q3, 2025, (with an end date of Sept 30, 2025) please input “2025Q3”.
If you are reporting more frequently, you can follow example #2:
- For reporting on materials processed and sent to end market in week one of October 2025 enter 20251031-A. For reporting on materials processed in week two enter 2025Q3-B and so on adding a suffix to each.
|
| 2 |
Reporting Period Start |
Input the first day of the applicable period, for example July 1, 2025. |
| 3 |
Reporting Period End |
Input the last day of the applicable period, for example Sept 30, 2025. |
| 4 |
Reference |
This is an optional field that allows you to enter a document number or any reference information key meaningful to your organization (max 12 characters). |
| 5 |
Supplemental Text |
This is an optional field that allows you to enter additional reference information (max 30 characters). |
| 6 |
Originating Site |
Key in the address of the Processing Facility where the material was processed. |
| 7 |
Material Status |
This identifies different kinds of rows in the table:
- RECEIVED: Key quantities associated with materials received to your facility.
- DIVERSION: Key quantities associated with materials sent to End Market.
|
| 8 |
Reporting Qty |
Step #1:
Key in the weight of the material received for processing (in kgs)
Step: #2
Key in weight of each resulting material diverted (in kgs)
|
| 9 |
Measured Quantity |
Automatically populated. |
| 10 |
Disp Code (Disposition Code) |
Use the dropdown to indicate how the material was managed. |


