Reporting Overview
Haulers and Processors use the WeRecycle Portal to submit reports and claims. This article introduces the reporting screen on the Portal, which is similar for the various report types. Detailed instructions are available for the following reports:
- Submit a Direct Move on Portal (Transport Claim)
- Submit a Bulk Move on Portal (Transport Claim + Bulk Move Report)
- Submit a Process Claim
- Submit a Diversion Report
- Upload Report as Spreadsheet
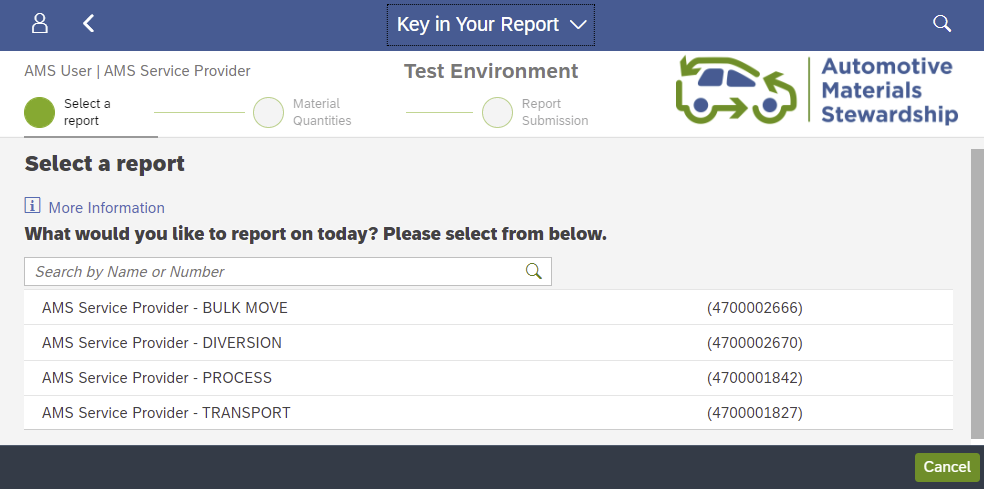
Select a Contract
From the home page, click 'Key in your report'. Then, click the applicable contract to begin your report.
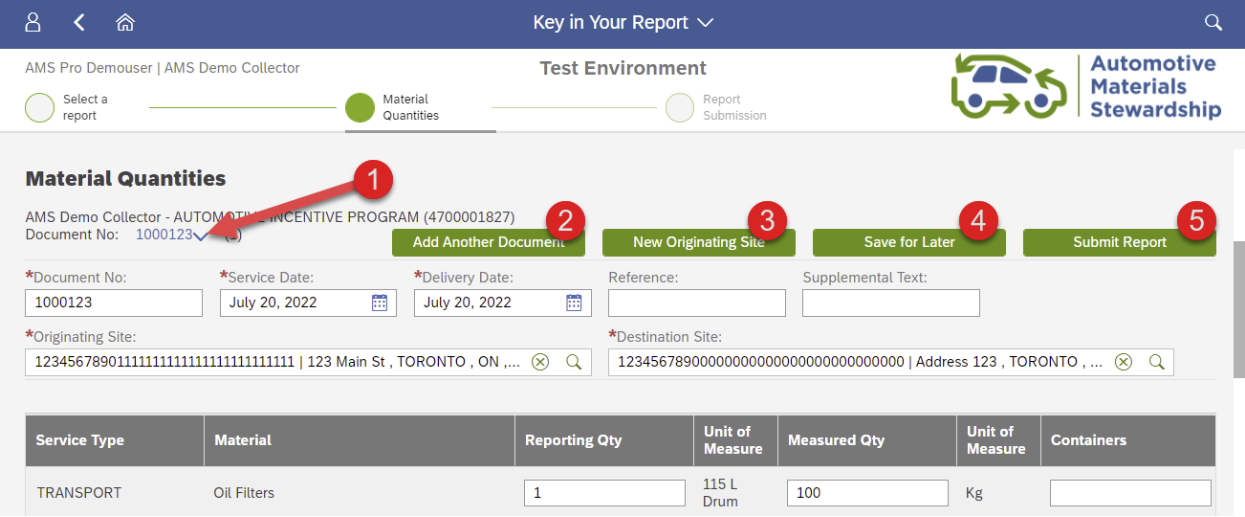
Button Summary
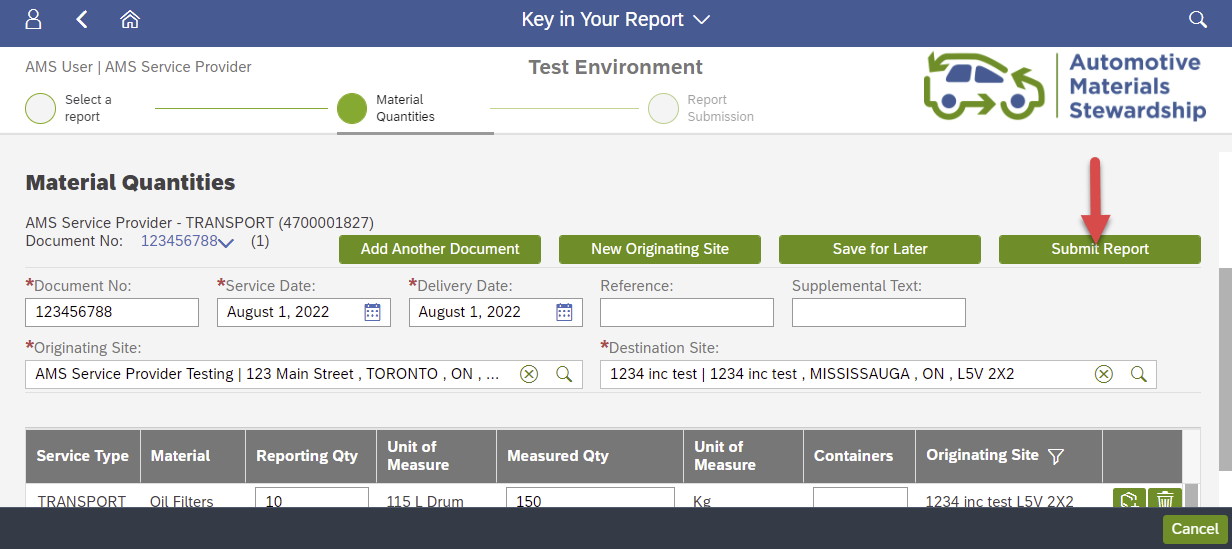
Along the top of the reporting screen, there is a drop down menu and four buttons. Use them as follows:
-
Document No.: The Portal allows you to key multiple reports at once. After clicking 'Add Another Document' (#2 below), you can use this drop-down menu to choose which in-progress report to view and edit.
-
Add Another Document: This provides a blank material quantities screen for a new Document No. of the same contract type to work on. The new document will appear in the document drop down beside Document No.
-
New Originating Site: Once information has been entered and saved for the first originating site, you can add additional originating sites to the same claim by clicking 'New Originating Site'. Click ‘Save for Later’ after entering data for each originating site. Select the filter icon to view the different originating sites data.
-
Save for Later: Saves your current document in draft status so it can be worked on later.
-
Submit Report: This will bring you to the next screen to confirm your submission before it is finalized. This will submit all draft reports.
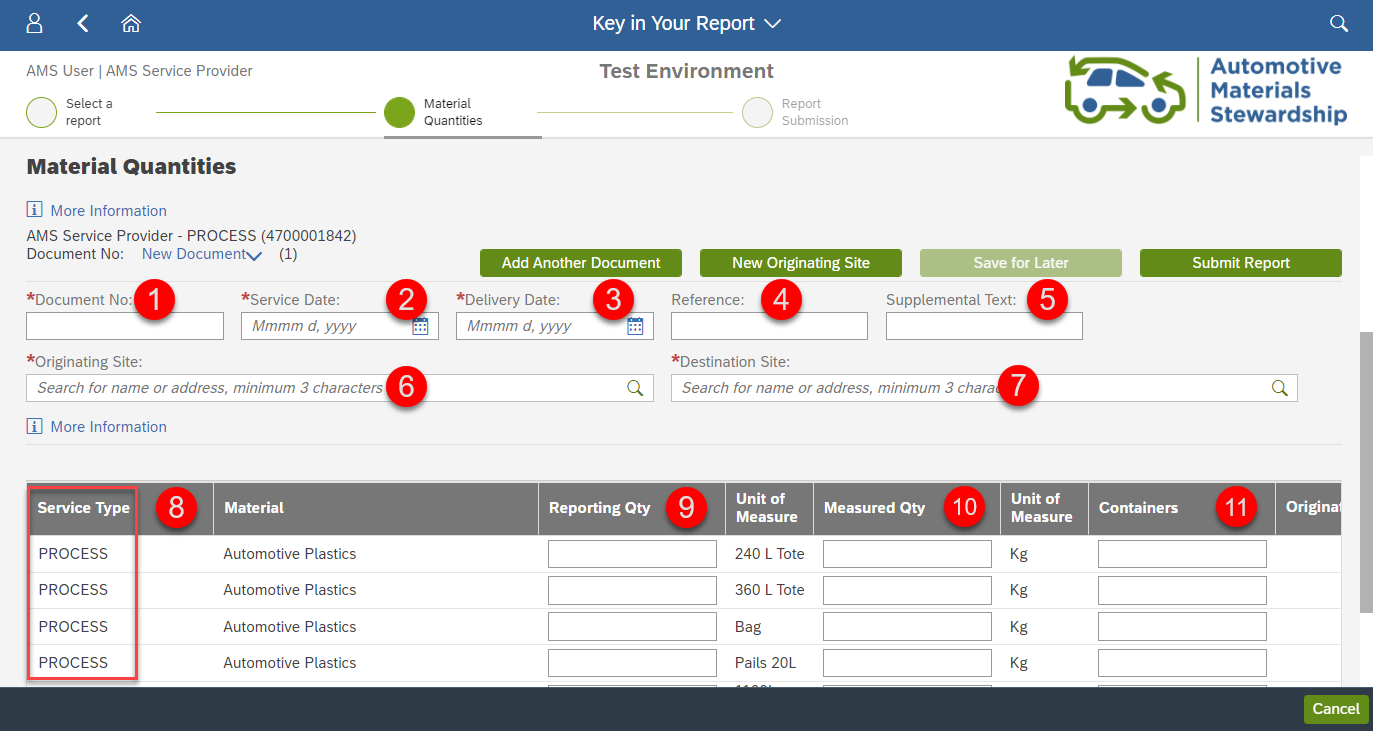
Field Summary
In each of the screen shots below, the red numbers correspond with a field in the Portal which is described in the field summary tables.
Hauler Field Summary
The columns highlight the scenarios reported by Haulers. Make sure to enter the correct information for your report.
|
#
|
Field |
DIRECT MOVE |
BULK MOVE |
|
|
Transport Claim |
Step 1: Transport Claim |
Step 2: Bulk Move Report |
||
| 1 |
Document No. |
Input the document number related to the movement, such as a BOL or Manifest number. |
||
| 2 |
Service Date |
Input the date the material was collected |
Input the date the material was picked-up from the last (or only) Consolidation Point. |
|
| 3 |
Delivery Date |
Input the date the material was dropped off at the |
Input the date the material was dropped off at the first (or only) Consolidation Point. |
Input the date the material was dropped off at the |
| 4 | Reference | This is an optional field that allows you to enter a document number or any reference information key meaningful to your organization (max 12 characters). | ||
| 5 | Supplemental Text | This is an optional field that allows you to enter additional reference information (max 30 characters). | ||
| 6 |
Originating Site |
Input the address of the Collection Site |
Input the address of the |
|
| 7 |
Destination Site |
Input the Processing Facility address, where the material was received. |
Input the first (or only) Consolidation Point, where the material was received. |
Input the Processing Facility address, where the material was received. |
| 8 |
Service Type |
This confirms you are currently keying a ‘Transport Claim’. |
This confirms you are currently keying a ‘Bulk Move Report’. |
|
| 9 |
Reporting Qty |
Key in the number of containers. For example, if you received three 240 Litre totes, key in “3” here. |
||
| 10 |
Measured Quantity |
Key in the actual weight of the material. For example, if you received three 240 Litre totes weighing 100 kg, key in “100” here. |
||
| 11 |
Containers |
An optional field where you can input container ID numbers. |
||
Processor Field Summary
The columns highlight the scenarios reported by Processors. Make sure to enter the correct information for your report.
|
# |
Field |
Process Claim |
Diversion Report |
| 1 |
Document No. |
Input the document number provided to you by the Hauler when they delivered the material.
|
Type the last date for the reporting period.
|
| 2 |
Reporting Period Start |
Input the date on the document provided to you by the Hauler. Generally, this is the same date of delivery from the Hauler. | Input the first day of the applicable period, for example July 1, 2025. |
| 3 |
Reporting Period End |
Input the date the material was received at the Processing Facility. | Input the last day of the applicable period, for example Sept 30, 2025. |
| 4 | Reference | This is an optional field that allows you to enter a document number or any reference information key meaningful to your organization (max 12 characters). | |
| 5 | Supplemental Text | This is an optional field that allows you to enter additional reference information (max 30 characters). | |
| 6 |
Originating Site |
Key in the address of where the material came from.
|
Key in the address of the Processing Facility where the material was processed. |
| 7 |
Destination Site |
Input the Processing Facility address, where the material was received. |
N/A - not required |
| 8 |
Service Type |
This confirms you are currently keying a ‘Process Claim’. |
This identifies different kinds of rows in the table:
|
| 9 |
Reporting Qty |
Key in the number of containers. For example, if you received three 240 Litre totes, key in “3” here. |
Key in the amount of the material sent to the destination site. Depending on the material, this may be a unit of weight or volume. Refer to the first ‘Unit of Measure’ column to see the required unit. |
| 10 |
Measured Quantity |
Key in the actual weight of the material. For example, if you received three 240 Litre totes weighing 100 kg, key in “100” here. |
If the unit of measure is the same as the unit of measure for ‘Reporting Quantity’, it will populate automatically. If the unit of measure is different, key in the applicable weight of the material. Refer to the second ‘Unit of Measure’ column to see the required unit. |
| 11 |
Containers |
An optional field where you can input container ID numbers. |
N/A |
| N/A | Disp Code | N/A | Use the dropdown to indicate how the material was managed. |
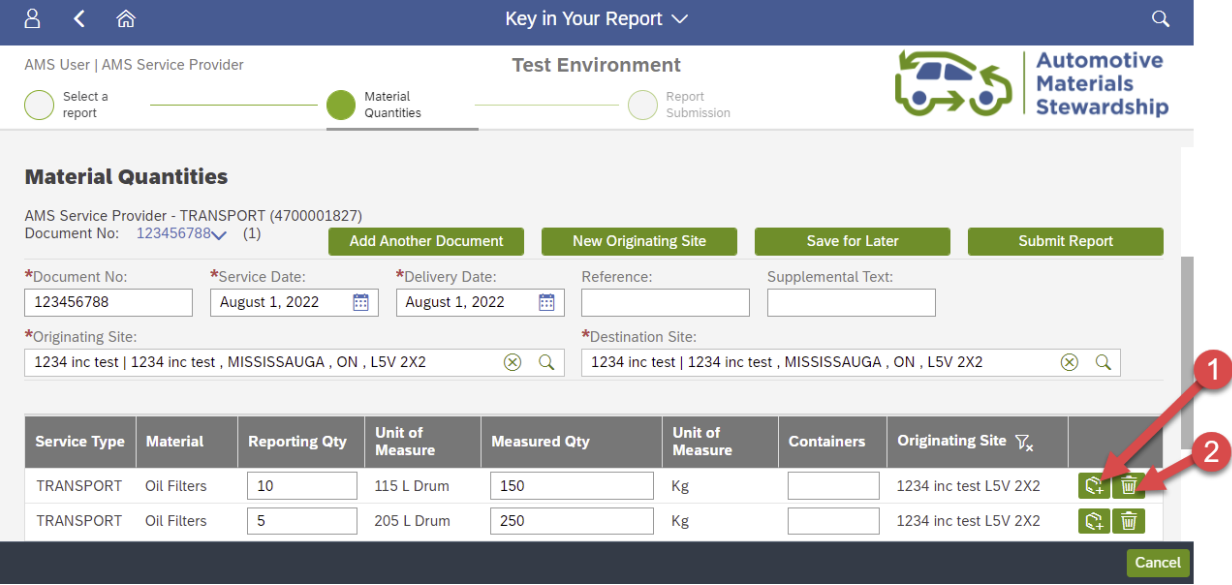
Add or Remove Material Rows
Use the ‘Copy Line’ and ‘Delete’ buttons in the material table to:
- Duplicate the material line
- Delete the material line
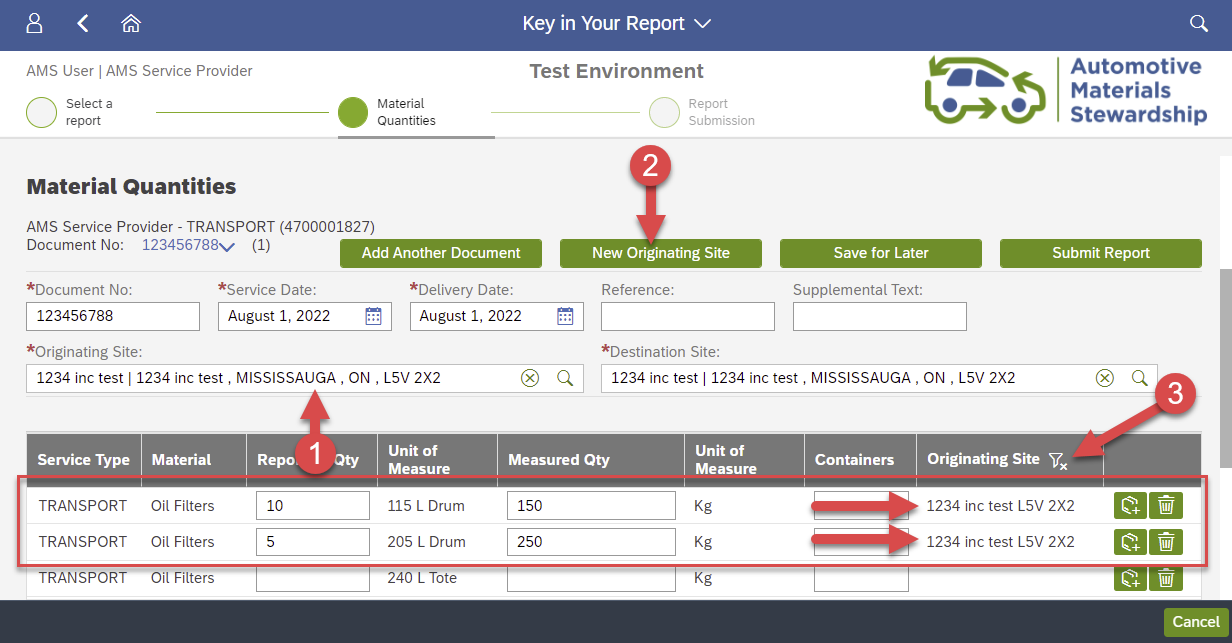
Multiple Originating Sites
If your document includes materials from different originating sites, follow the steps below. If not, skip to Submission.
Use the ‘New Originating Site’ button and the filter on the ‘Originating Site’ column to key different Originating Sites for different material rows.
- First, key in the first Originating Site and the material quantities associated with it.
- Next, click ‘New Originating Site’.
- Remove the filter on the ‘Originating Site’ column to see all information keyed.
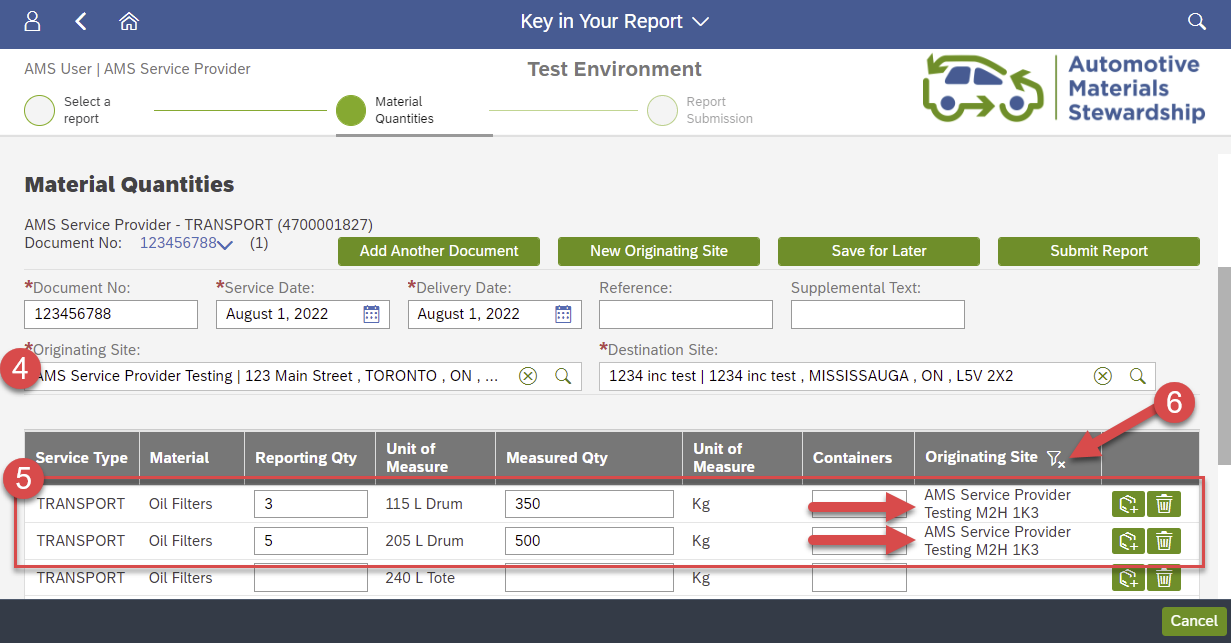
After clicking ‘New Originating Site’, now:
- Input the new Originating Site address
- Key materials as needed
- Remove the filter on the ‘Originating Site’ column to see all rows, regardless of Originating Site
After removing the filter, you can see all keyed quantities:
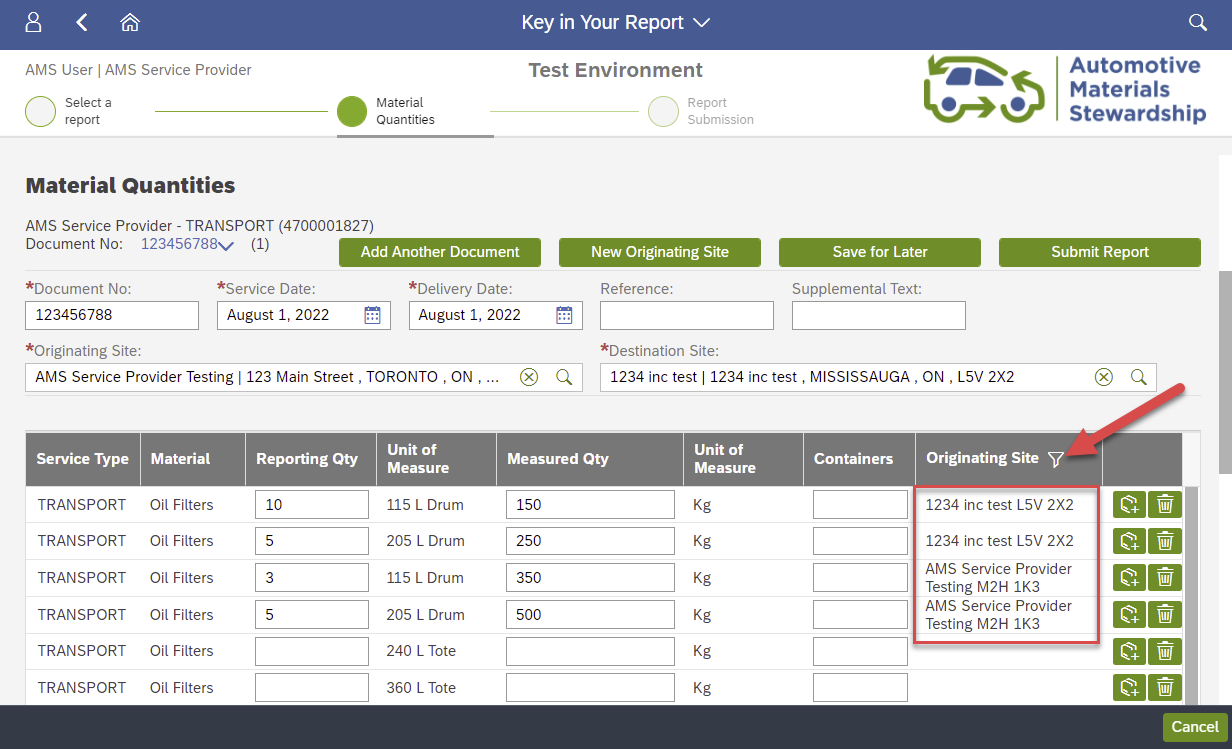
Repeat these steps as needed to add originating sites.
Submission Screen
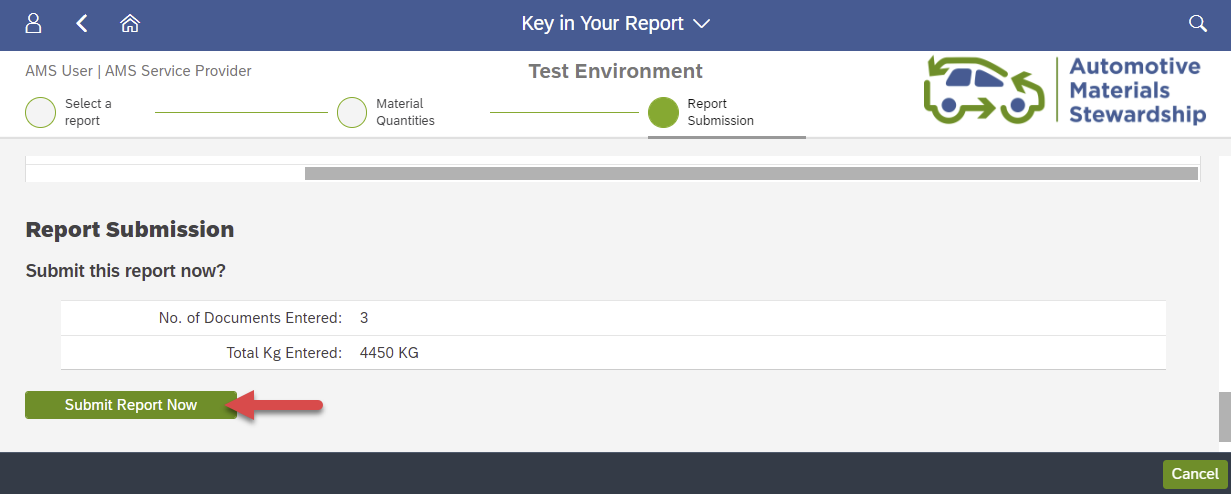
Click ‘Submit Report’ at the top right when finished keying all information.
Review the summary information on screen.
- If it is not correct, scroll up to change your keyed information.
- If it is correct, click ‘Submit Report Now’ to submit your report.
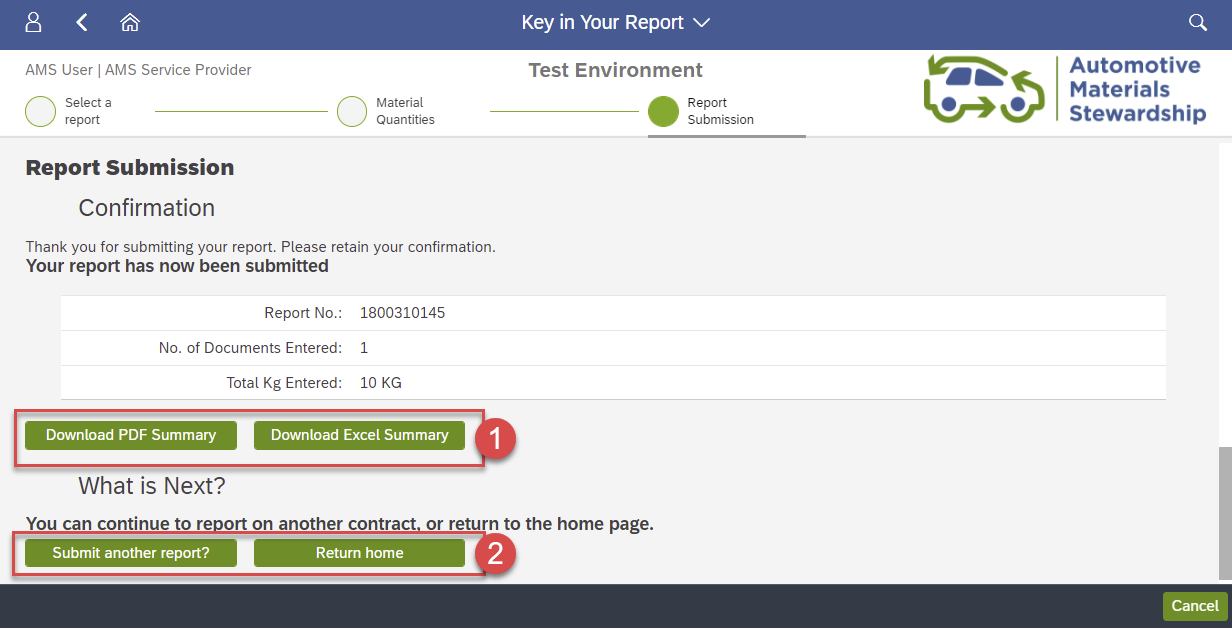
You have successfully submitted your report.
You may download a PDF or Excel summary using the options on screen. Use the ‘Submit Another Report’ or ‘Return Home’ buttons as needed.